
LinkedIn Headshot Poses: Examples and Photographer Tips
LinkedIn headshot poses at a glance
The most dependable starting pose is simple: turn your torso slightly away from the camera, bring your face back toward the lens, relax your shoulders, and keep your eyes on the camera. Then compare a second straight-on frame and a warmer variation with a small lean or head turn. The best choice is the frame that still looks like you at LinkedIn thumbnail size.
- Slight body angle: creates depth while keeping the face easy to recognize.
- Straight-on: feels direct and formal when the shoulders and jaw stay relaxed.
- Small lean: adds energy without pushing the face too close to the lens.
- Hands in frame: work when they rest naturally; forced gestures pull attention from the face.
- Expression: choose a restrained smile or a fuller smile based on how you normally meet clients and colleagues.
For clothing choices beyond these pose decisions, use our headshot wardrobe guide. If you want guided portraits for your own profile, see LinkedIn headshots in NYC.
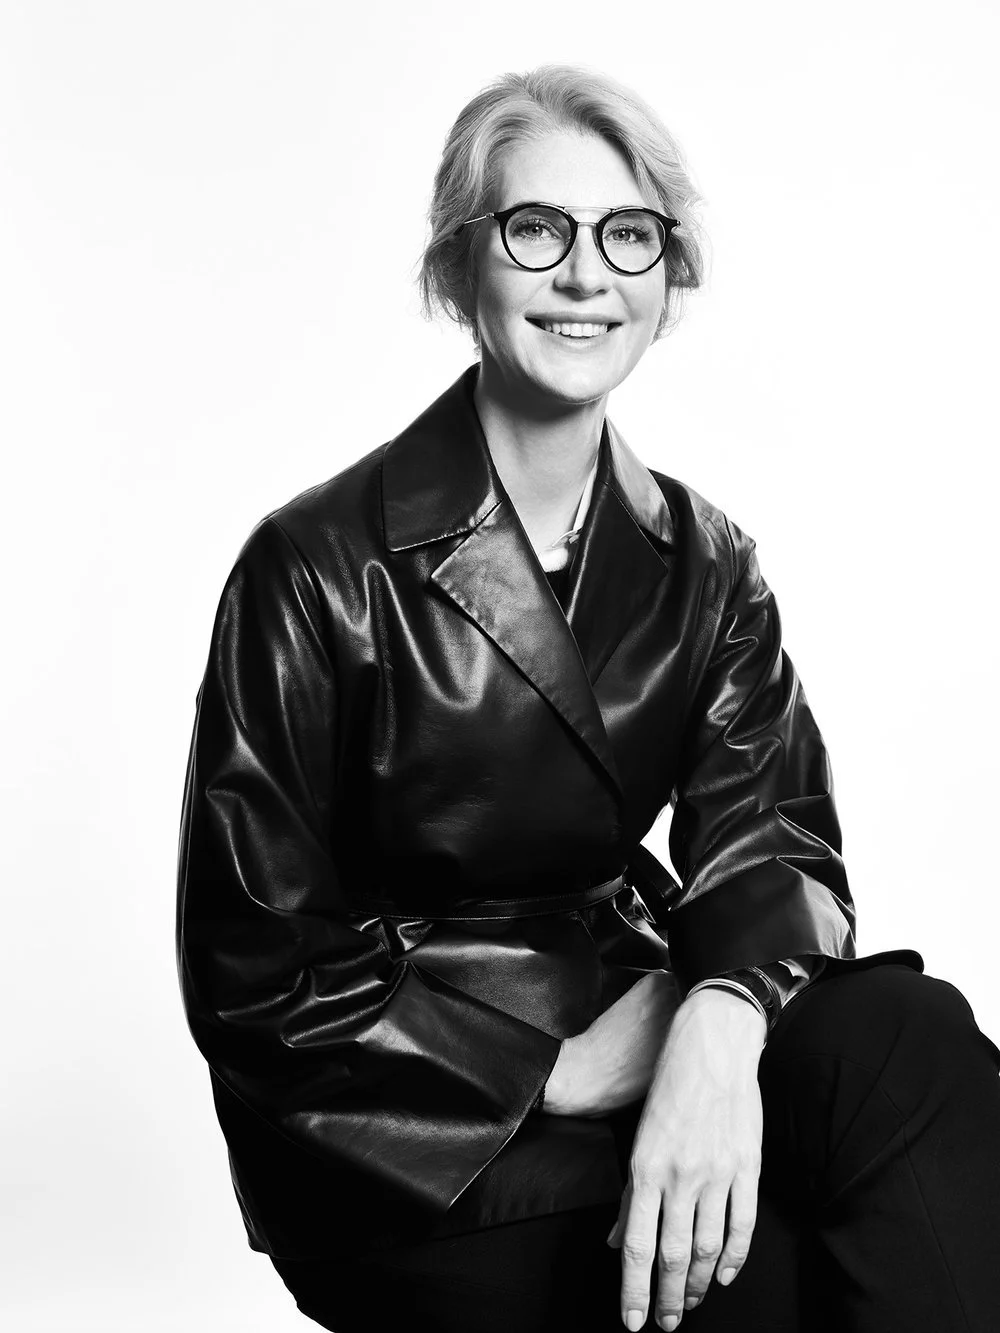

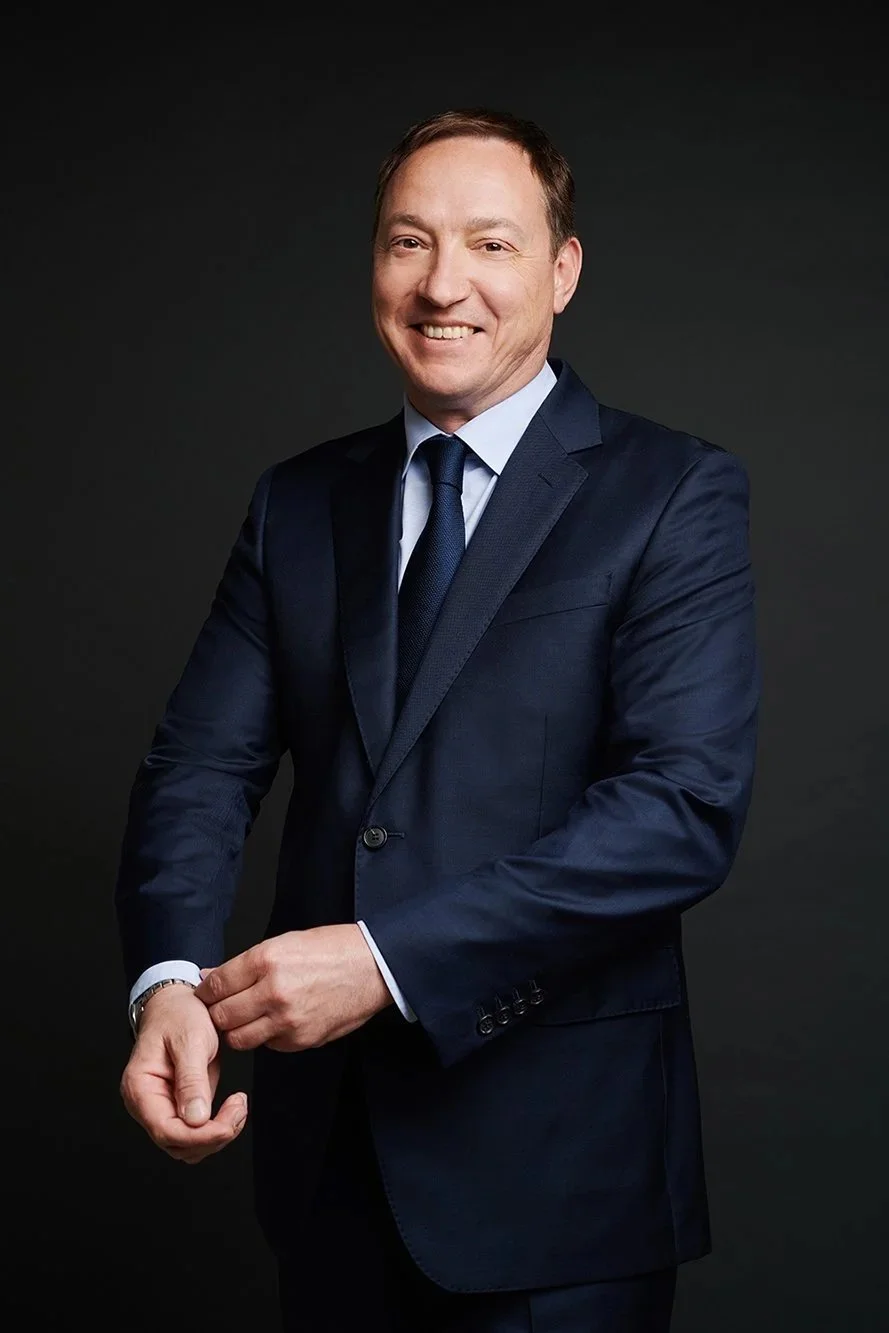

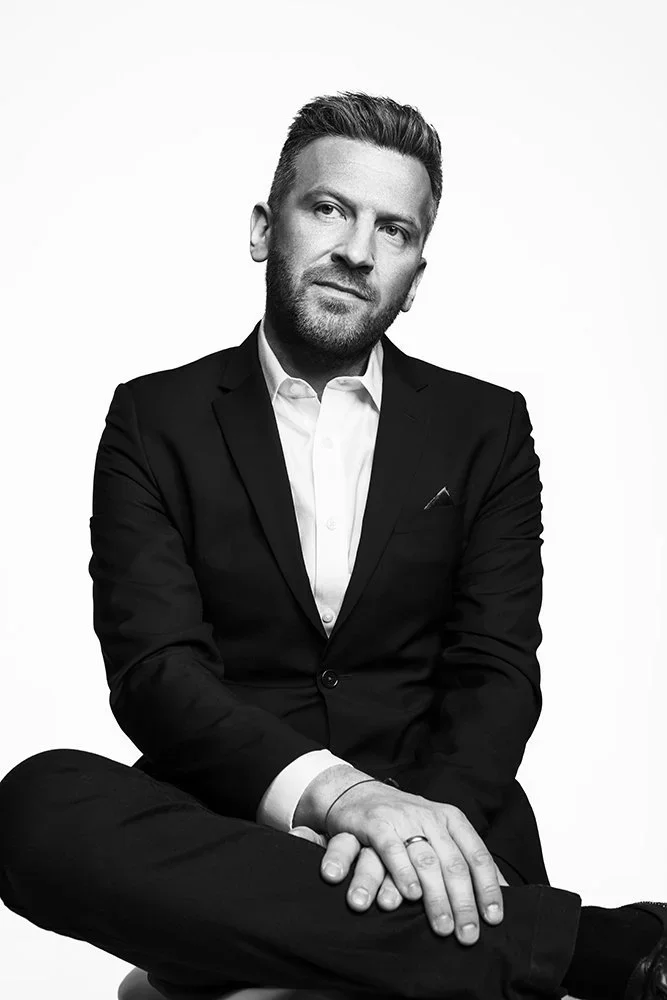

Compare these portraits as starting points, not as a set of rigid formulas. The first example uses a seated three-quarter posture with an open expression. The second faces the camera with both forearms resting on a surface, which keeps the shoulders level and gives the hands a clear place to settle. The third is a standing portrait with the torso angled and the hands visible near the jacket cuff. Each works because the position is readable and the expression remains natural.
Look at the face first, then check whether the shoulders, hands, and crop support it. A pose should organize the frame without becoming the subject of the photograph.
Build the pose from posture, angle, and eye line
Start with posture that feels alert but not rigid. Lengthen your spine, let the shoulders fall away from the ears, and keep your weight balanced. If tension appears in the neck or jaw, reset before changing anything else.
Choose a body angle
A slight turn creates separation between the shoulders and adds depth. Bring your nose back toward the lens so the face stays open. A straight-on pose is useful for a more formal frame, but it needs relaxed shoulders to avoid an ID-photo feeling. Compare both rather than assuming one angle suits every person.
Set the chin
Move the chin a little forward, then lower it only enough to keep the eyes level with the camera. Pulling the chin back compresses the neck; lowering it too far hides the eyes. The adjustment should be small and should still feel like your normal posture.
Use direct eye contact
For a LinkedIn profile image, looking into the lens gives the clearest connection at a small size. Looking off camera can work for editorial or branding photographs, but it is usually less useful as the primary circular profile crop. Keep the eyes present rather than widening them or holding a fixed stare.
Choose the expression after the posture
Make a neutral frame, a restrained smile, and a fuller smile without moving the body. Comparing expressions from the same position makes the choice easier. The useful question is whether the expression matches how you normally interact in your role, not whether it follows an industry stereotype.
Check the crop before choosing a final
LinkedIn displays profile photos in a circle and often at a small size. Keep the face large enough to recognize, allow space around the hair, and avoid placing important hand gestures at the crop edge. Test the square and circular versions before selecting the final image.



Clothing and preparation
Clothing should give the pose a clean outline and keep attention on the face. Bring a well-fitted solid top, remove lint and wrinkles, and check that collars and jacket shoulders sit correctly in both straight-on and angled frames. Detailed color, fabric, grooming, and role-specific advice belongs in what to wear for headshots.
Practice only enough to recognize your comfortable posture. A mirror can help you notice raised shoulders or a habitual chin lift, but rehearsing a fixed smile usually makes the expression harder to vary during the session.
Three useful LinkedIn headshot poses
These are starting positions to compare on camera. Small adjustments to shoulder angle, head turn, and expression matter more than the pose name.
Straight-on and relaxed
Face the camera with level shoulders, direct eye contact, and the arms relaxed or supported below the crop. This produces a clean, direct frame. If it feels severe, soften the mouth, release the jaw, or turn one shoulder a few degrees instead of forcing a smile.
Three-quarter turn
Turn the torso slightly and bring the face back toward the lens. Keep both eyes clearly visible and avoid rotating so far that the far shoulder disappears. This angle adds shape to a head-and-shoulders crop and gives standing hands a natural place near the jacket or waist.
Seated with a small lean
Sit tall, place the forearms or one hand on a stable surface, and lean forward only enough to keep the posture active. This works well when the hands are included because the surface prevents them from floating awkwardly. Watch for shoulders creeping upward as you lean.
How to place hands
Hands are optional in a LinkedIn headshot. If the crop includes them, give them a job: rest them on a table, hold one wrist loosely, or let one hand settle near a jacket cuff. Keep fingers relaxed and avoid pressing a hand into the face. If a gesture attracts attention before the eyes do, simplify it.
Match the pose to the photograph's use
Use the tighter, direct frame for LinkedIn and small directory thumbnails. A company bio can take a slightly wider crop with more shoulder and hand context. Press and speaker materials may need both portrait and landscape options. The pose can stay consistent while the crop changes.
For choosing among finished files, continue with the business profile picture selection guide. Companies planning a consistent set can review team headshots in NYC.
| Factor | Traditional Corporate | Creative Fields | Startup Environment |
|---|---|---|---|
| Body Angle | 30-45 degrees | 45+ degrees acceptable | 45 degrees with personality |
| Expression | Subtle confidence | Warm with personality | Approachable energy |
| Formality | High | Medium | Casual professional |
| Recommended Pose | Executive Classic or Confident Angle | Approachable Professional with variations | Confident Angle with relaxed elements |
Common pose problems and practical fixes
- Raised shoulders: breathe out, drop the shoulders, and reset the hands.
- Chin pulled back: move the forehead and chin slightly toward the camera before lowering the chin.
- Body turned too far: rotate back until both shoulders support the face instead of narrowing the torso into a sliver.
- Fixed smile: pause, look away, then return to the lens as the expression forms.
- Busy hands: rest them outside the crop or place them on one stable surface.
- Crop too loose: test the image as a small circle; if the face is hard to read, use a tighter file.
A short selection sequence
- Compare frames with the same expression and different body angles.
- Remove images with tension in the jaw, neck, shoulders, or hands.
- Compare neutral, restrained-smile, and full-smile options from the strongest position.
- Preview the finalists in a square and circular crop.
- Choose the image that is current, recognizable, and appropriate for the places it will appear.
Plan the photograph around the profile
Update your LinkedIn headshot when your appearance changes enough that colleagues might not recognize you, and keep a high-resolution original for company bios or press requests. For a guided individual session, visit LinkedIn headshots in NYC.
Organizing headshots for your whole team? We run on-site sessions for 5–500+ people across NYC →
Pose, wardrobe, and final-image selection are separate decisions. Use the wardrobe guide before the session and the profile picture checklist when reviewing finished photographs.